
Introduction
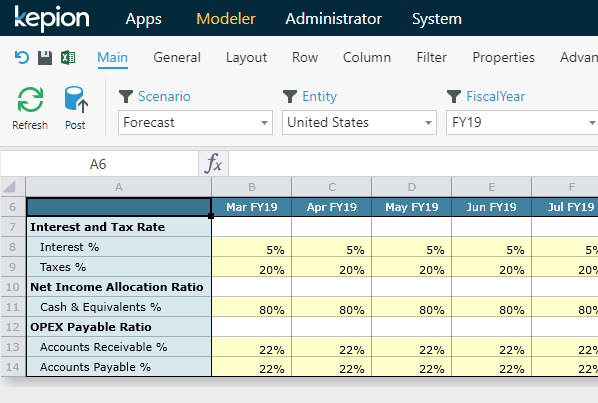
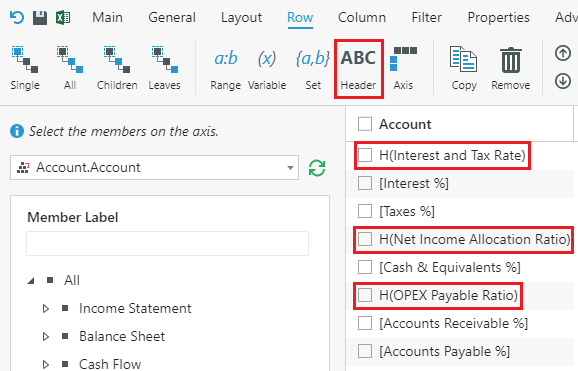
Headers give users more flexibility when designing Form axes. In the example below, the rows (Interest and Tax Rate, Net Income Allocation Ratio, and OPEX Payable Ratio) are all Form Headers defined in the Row tab.
Example
Headers allows users to add 'dummy members' for display purposes. For instance, you can add empty Headers or give the Header a display name. Headers will be displayed as H(HeaderName) in the axis definition.
Note: The Header name has to be different from real Dimension Members to avoid conflict.
Although both can add new rows/columns to a Form, adding Headers and inserting rows/columns differ considerably.
- Adding Headers is a dynamic solution, i.e., the position of the Header is decided by its order in the axis definition list. Adding Headers will change the query (i.e., the contents in the Native MDX tab) of the Form.
- Inserting a row/column in the Form causes it to store the row/column with its row/column number. Therefore the row’s position is static, even if the Form definition changes.
Advanced Usage
You can also define calculations in Headers. The calculation will be processed when the Form is rendered. In other words, the calculated value is Form-based, so it does not exist in the cube.
For example, in the Form above, let's say we want to add together the Interest % and Taxes % rows.
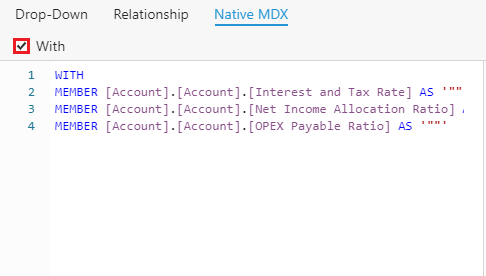
1. Go to Advanced > Native MDX.
We can find a WITH statement on the very top of the query. This statement is generated automatically , and is where we define the Headers.

2. Copy the highlighted section.
3. Select With and in its box paste the copied section.
3. Define the calculation inside the single quotes after AS, as shown below:
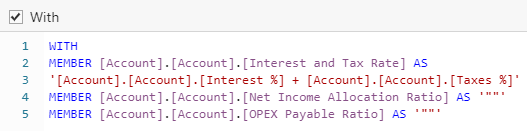
You should find your overall MDX query in the right pane changes as you edit the With box. It's simply replacing the original WITH statement with your custom WITH statement.
Return to the Main tab to verify the results. You should find the Interest and Tax Rate row now has data.
