By default, Kepion comes configured with two calendar definitions: Annual and Fiscal. While the Annual Calendar definition always begins on January 1st and ends on December 31st, the Fiscal Calendar can be configured to start on a different date. If a single Application requires the use of more than one Fiscal Calendar, it's possible to configure additional calendars by adding attributes to the Time Dimension.
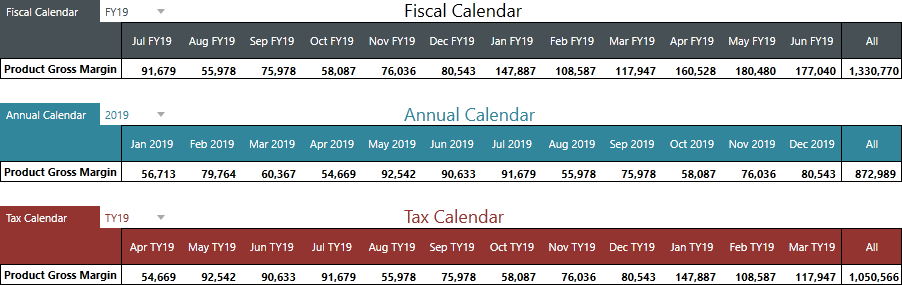
If we examine the D_Time table in the Application Database, we can see a number of attributes (e.g., Year, Quarter, Month, etc.) These are the Annual Calendar definitions.
A number of equivalent attributes also define the Fiscal Calendar (e.g., FiscalYear, FiscalQuarter, etc.)
To add a new calendar, we simply need to add and populate additional attributes for each of these concepts.
Example
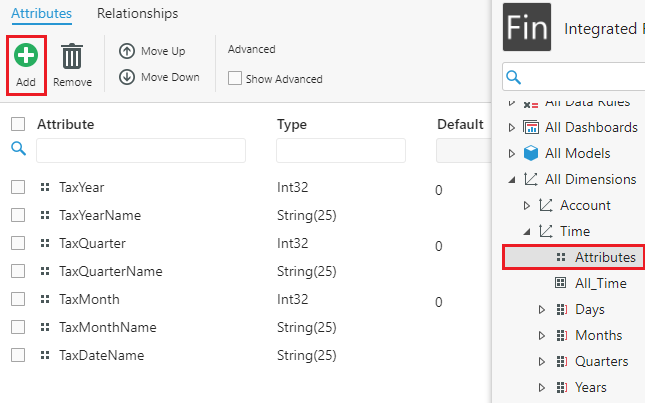
1. In the Modeler, go to the Time Dimension and select Attributes.
2. Click Add.
There are eighteen attributes that constitute the Fiscal Calendar definition, but let's just add the seven most frequently used. You can add more or less depending on your specific requirements.
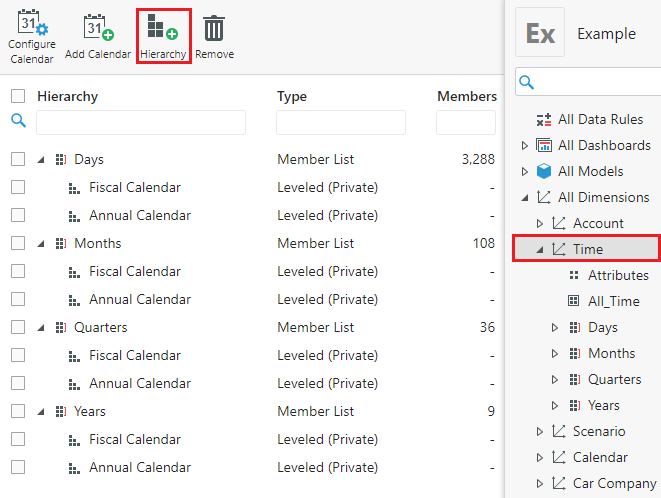
2. Go to the Time node and select Hierarchy.
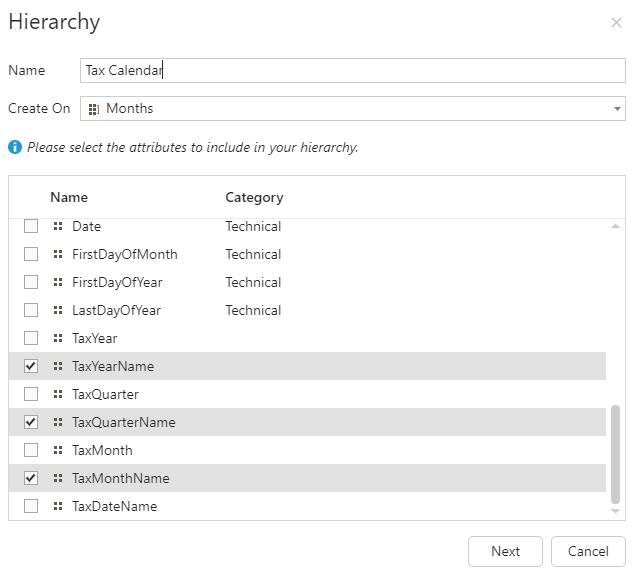
3. Enter a name for the hierarchy, choose the desired granularity from Create On dropdown menu, and select attributes.
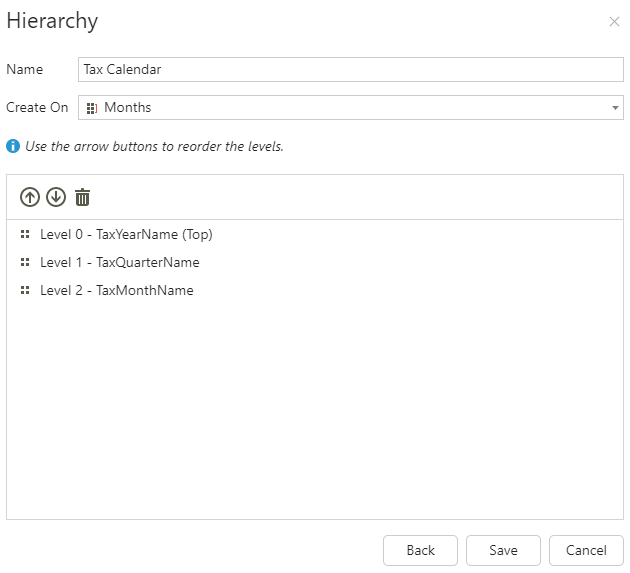
4. Click the arrows to shift attributes up or down the Hierarchy.
Tip: Ensure that the lowest level of the Hierarchy corresponds to the lowest level of the Member List you're using. For example, the Months Member List should contain an attribute for months at the lowest level.
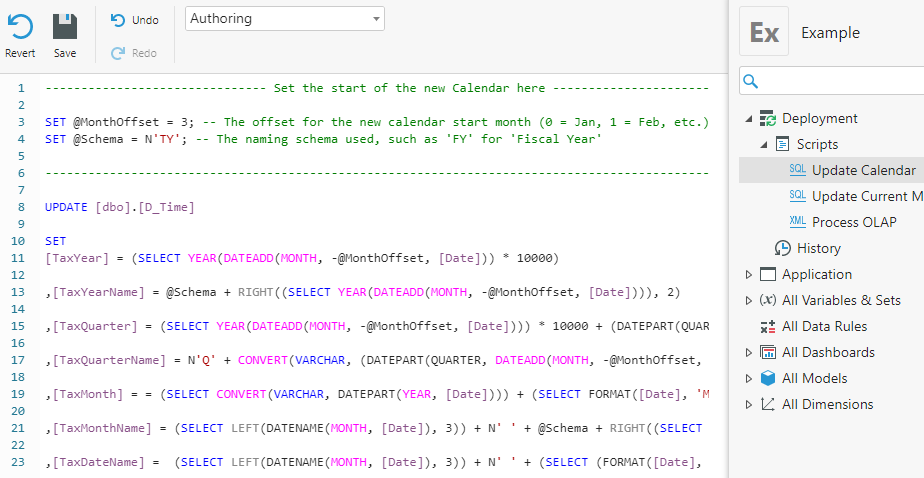
5. Open SQL Server Management Studio and run the following script to populate the attributes we added.
Make sure to make the following changes before running the script:
- Change <APPLICATION_DATABASE> to the correct Application name.
- Change the @MonthOffset variable to the offset for the new calendar.
- Change the @Schema variable to define the naming schema the calendar will use.
- Change <CALENDAR_NAME> to match the name of the attributes we created in Step 1.
Note: If you changed the number of attributes from the example above, you'll have to change the SQL script accordingly.
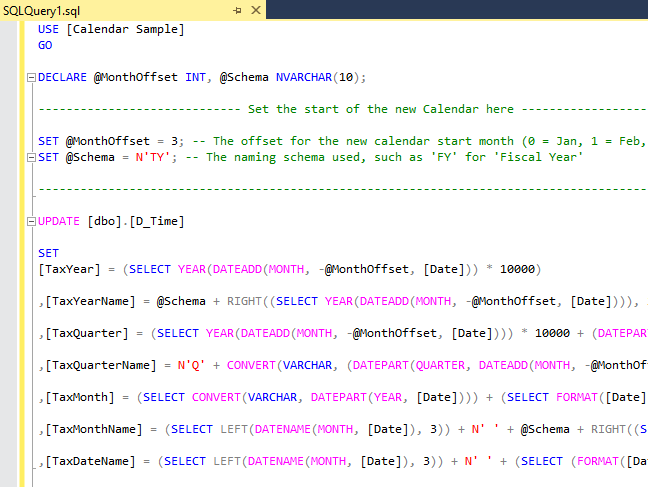
USE [<APPLICATION_DATABASE>]
GO

DECLARE @MonthOffset INT, @Schema NVARCHAR(10);

----------------------------- Set the start of the new Calendar here -----------------------------

SET @MonthOffset = 0; -- The offset for the new calendar start month (0 = Jan, 1 = Feb, etc.)
SET @Schema = N'FY'; -- The naming schema used, such as 'FY' for 'Fiscal Year'

--------------------------------------------------------------------------------------------------

UPDATE [dbo].[D_Time]

SET
[<CALENDAR_NAME>Year] = (SELECT YEAR(DATEADD(MONTH, -@MonthOffset, [Date])) * 10000)

,[<CALENDAR_NAME>YearName] = @Schema + RIGHT((SELECT YEAR(DATEADD(MONTH, -@MonthOffset, [Date]))), 2)

,[<CALENDAR_NAME>Quarter] = (SELECT YEAR(DATEADD(MONTH, -@MonthOffset, [Date]))) * 10000 + (DATEPART(QUARTER, DATEADD(MONTH, -@MonthOffset, [Date]))) * 10

,[<CALENDAR_NAME>QuarterName] = N'Q' + CONVERT(VARCHAR, (DATEPART(QUARTER, DATEADD(MONTH, -@MonthOffset, [Date])))) + N' ' + @Schema + RIGHT((SELECT YEAR(DATEADD(MONTH, -@MonthOffset, [Date]))), 2)

,[<CALENDAR_NAME>Month] = (SELECT CONVERT(VARCHAR, DATEPART(YEAR, [Date]))) + (SELECT FORMAT([Date], 'MM')) + '00'

,[<CALENDAR_NAME>MonthName] = (SELECT LEFT(DATENAME(MONTH, [Date]), 3)) + N' ' + @Schema + RIGHT((SELECT YEAR(DATEADD(MONTH, -@MonthOffset, [Date]))), 2)

,[<CALENDAR_NAME>DateName] = (SELECT LEFT(DATENAME(MONTH, [Date]), 3)) + N' ' + (SELECT (FORMAT([Date], 'dd'))) + N', ' + @Schema + RIGHT((SELECT YEAR(DATEADD(MONTH, -@MonthOffset, [Date]))), 2);
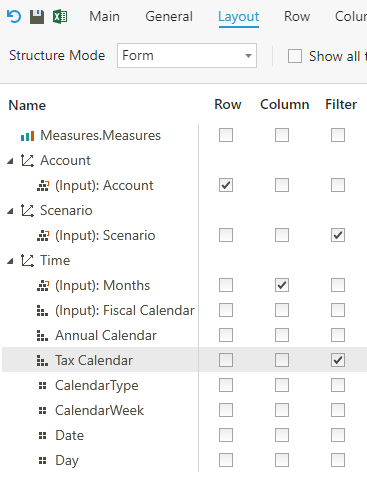
6. To use the new calendar, select the new Calendar Hierarchy (or relevant attribute) as a Filter in the Layout tab of a Form.
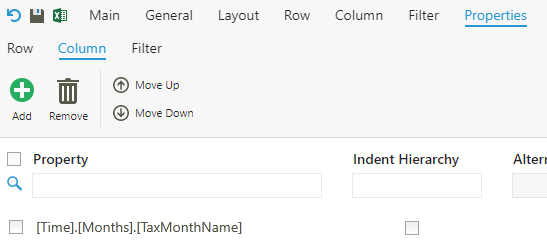
7. Go to Properties > Column, choose which attribute of the calendar you want displayed.
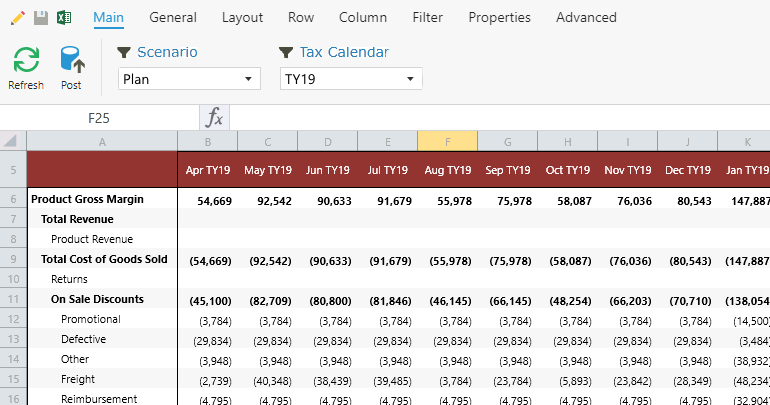
8. Return to the Main page to see the change reflected.
Deployment Script
As a best practice, if you add additional calendar definitions to Kepion, you should also create a Deployment Script that will automatically repopulate the new Time Dimension attributes. This way you won't have to worry about potential changes to the main calendar configuration.
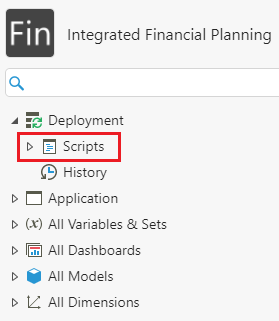
1. Under Deployment, go to Scripts.
2. Click Add to create a new SQL Script.

3. Enter the same SQL code from before, to populate the database.