Introduction
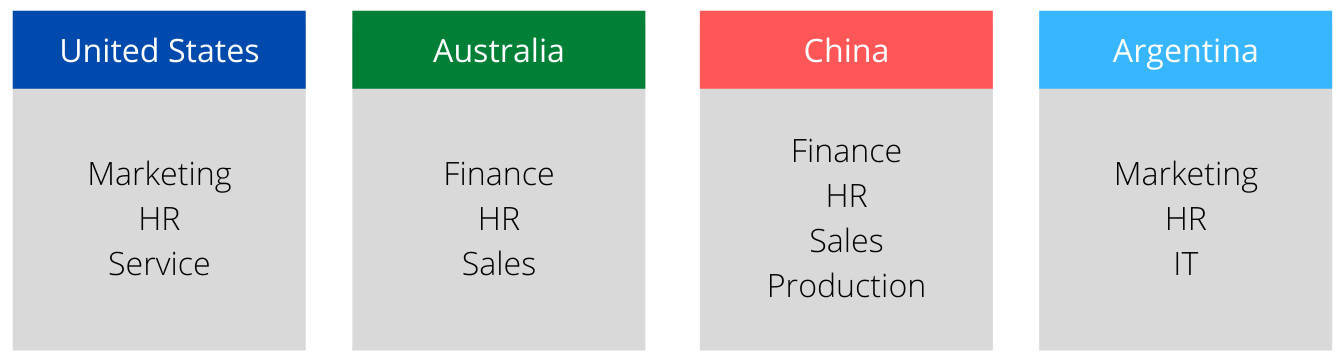
In this article, let's walk through the steps to configure a relationship using Input Forms. For example, imagine that we have a number of entities and departments. A department could be valid in all, some, or only one of the entities. As there's no key or intrinsic relationship between entities and departments, the best solution is to create a Form to manually define the mapping.
For more information on Valid Relationships and Linked Models, visit the following articles:
- Use Linked Models
- Use Relationships
- Configure Relationships using Data Rules
- Configure Many-To-Many Relationships
Example
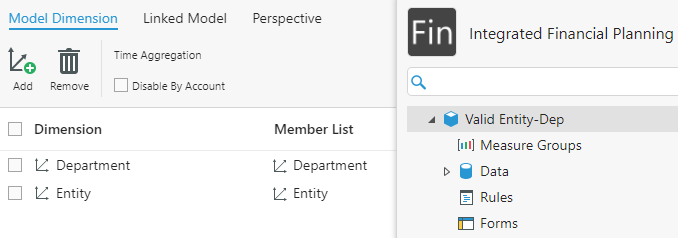
1. Create a Validation Model to define valid combinations of Dimension Members.
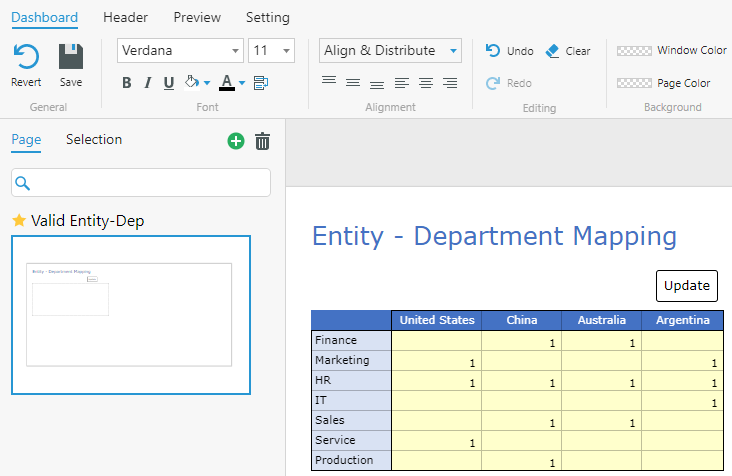
We called our Model Valid Entity-Dep and added the Entity and Department Dimensions.
2. Deploy the Application.
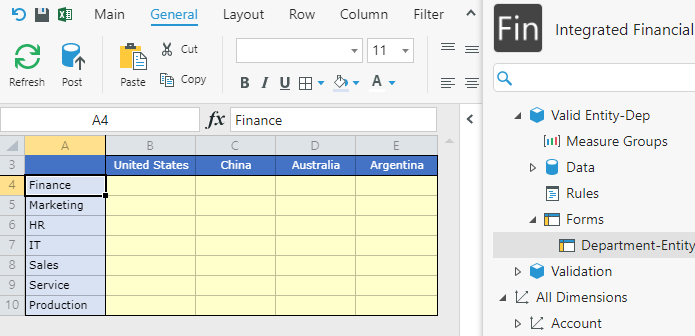
3. Create a Form in the Model to define the relationship. We named it Department-Entity.
4. Configure the Form with all Department Members on the rows and Entity Members on the columns.
Note: The axis placement of the Dimensions does not matter. You can have Entity on the rows and Department on the columns.
5. Create a special Admin Dashboard and add the Form.
An Admin Dashboard is a regular Dashboard used for managing administrative settings and other configurations. For our purposes, we just need the Form and a way to Post data.
Note: Ensure you can write to the Dashboard App and Model.
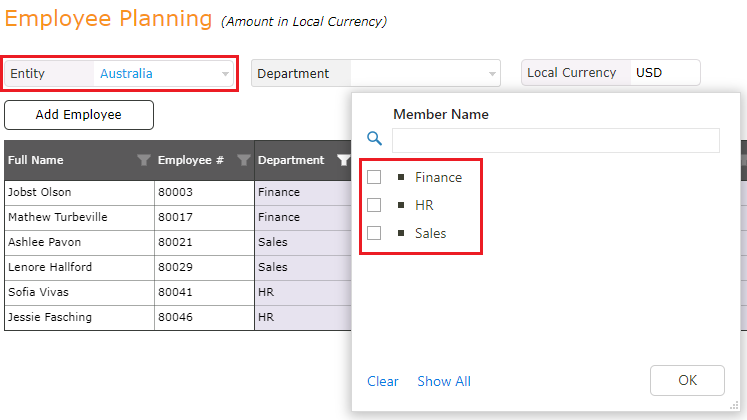
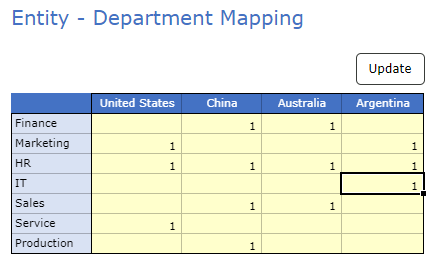
6. Go to the App and enter a value in every intersection where a relationship exists between Departments and Entities.
7. Link our Validation Model to the Model you want to apply the relationship.
8. In your target Form, go to Advanced > Relationship and click Add.
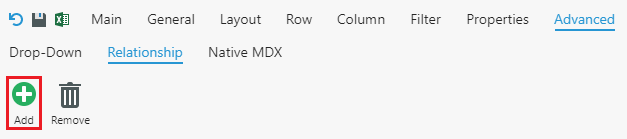
9. Select the Validation Model and click Add.
10 Select  and choose Department.

Now only valid departments are shown for each Entity.