Introduction
The Time Dimension is one of the Dimensions automatically included in all Kepion Applications. Essentially, the Time Dimension contains your calendars, which can be configured to calculate and/or display data for the exact units/periods of time relevant to your business goals.
Basic Knowledge
The Time Dimension has four main actions:
Configure Calendar - Defines the Application's Calendar—fiscal or Gregorian, start date, and year.
Add Calendar - Creates a new Calendar with the range and granularity you need.
Add Hierarchy - Creates a new Hierarchy with the desired attributes in your desired order.
Remove - Deletes a Calendar or Hierarchy.
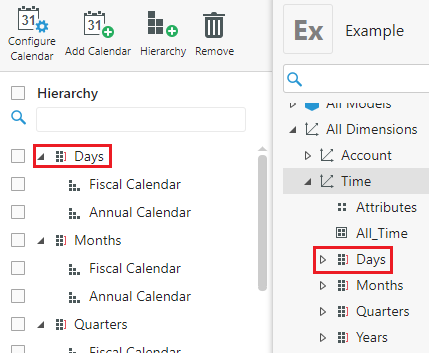
This Dimension is automatically organized into the following 'levels of granularity':
- Days
- Months
- Quarters
- Years
How you currently track your financials will, to an extent, determine the units you can use in Kepion. If a company only tracks their monthly finances, for example, it would be able to calculate figures for quarters and years but not days and weeks.
That being said, Kepion supports multiple Models at different times granularities, within the same Application. For instance, a business can have a Sales Model for products sold per day, a Reporting Model for profits and expenses by the month, and so on.
You should also consider the time units relevant to your task or deliverable. For example, you would want to show only fiscal years for a Year over Year (YoY) comparison. A weekly expense report, on the other hand, would likely display only daily financial data for a fiscal week.
Tip: If you need assistance configuring fiscal weeks, refer to this article.
Configure Calendars
1. In the Modeler, go to All Dimensions > Time.
2. Click Configure Calendar.

3. Click the Configure field to select a Gregorian or Fiscal configuration. A Gregorian calendar always goes from January 1 to December 31. A fiscal calendar can start or end at any point of the year, as long as it spans 12 months.
4. Click the Start field to select a new start date for the fiscal calendar.
4. Click Save.
Tip: If you need to set up multiple fiscal calendars with different start dates, refer to this article.
Add Calendars/Hierarchies
Calendars are the full length of time usually at one level of granularity. Hierarchies stratify Calendars into multiple levels of granularity. Kepion enables you to create multiple Calendars with their own Hierarchies.
Add Calendars
1. Confirm you have your desired configuration by clicking Configure Calendar. This configuration will determine all of the start dates for new Calendars.
2. Click Add Calendar.

3. Fill out the fields in the pop-up window.
Note: We typically recommend you select one Granularity at the lowest level you're capturing data. For reference, days would be the lowest possible granularity.
4. Click Save.
Your new Calendar should automatically open. If not, double-click your new Calendar in the Time Dimension. As you can see in the screenshot below, we selected Months for the Granularity.
Add Hierarchies
1. Click Hierarchy.

2. Enter a Name for the new Hierarchy.
3. Select the Calendar for the new Hierarchy.
4. Click the checkboxes of the desired attributes.
5. Click Next.
6. Order the attributes from the largest set (fiscal year) to the smallest sub-set (fiscal date).
Note: If you want your Forms to be 'inputable,' the last level must be on the same granularity as the Calendar. MemberID typically serves as the lowest level.
7. Click Save.
Remove Hierarchy
1. Select all of the Calendars or Hierarchies you want to remove.

2. Click Remove.

3. Click OK.
Extend Calendars
1. Double-click the Calendar you wish to extend OR select it from the right menu.

2. Select Extend.

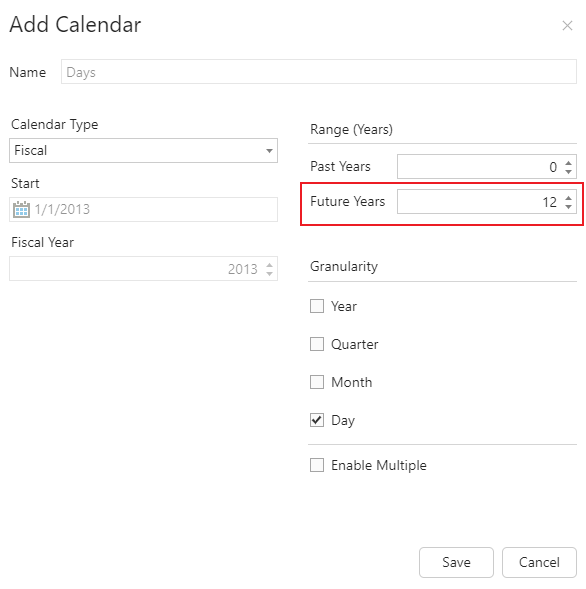
3. In the Future Years field, enter the number of years past the start date you want to extend this Calendar. If you want to extend the Calendar backwards, enter the desired number in the Past Years field.
The screenshot below shows a Calendar that extends to 2025.

4. Click Save.
